合肥网站建设公司还有不牡丹江seo
参考文章
penHarmony南向开发笔记(一)开发环境搭建
OpenHarmony(鸿蒙南向开发)——标准系统移植指南(一)
OpenHarmony(鸿蒙南向开发)——小型系统芯片移植指南(二)
续接上篇
一,设置和windows共享目录
在windows文件浏览器地址栏输入\\wsl$,然后回车,可以看到

可以进入到Ubuntu-20.04\home\user_name目录下,user_name目录下的文件可以修改,但其他目录下文件不行。然后双击此电脑打开后,右键点击添加一个网络位置,在打开的网络向导中点击下一步到如下界面,并把前面到user_name(例如\\wsl.localhost\Ubuntu-20.04\home\aping)的地址粘贴进去

让后按下一步完成操作。
二,配置Ubuntu环境
1,将shell 环境由dash改为bash,执行如下指令
sudo dpkg-reconfigure dash进入如下界面,按左右箭头选择No,然后回车

2,替换Ubuntu软件源
在LUG's repo file generator中下载最新源
deb https://mirrors.ustc.edu.cn/ubuntu/ focal main restricted universe multiverse
deb-src https://mirrors.ustc.edu.cn/ubuntu/ focal main restricted universe multiversedeb https://mirrors.ustc.edu.cn/ubuntu/ focal-security main restricted universe multiverse
deb-src https://mirrors.ustc.edu.cn/ubuntu/ focal-security main restricted universe multiversedeb https://mirrors.ustc.edu.cn/ubuntu/ focal-updates main restricted universe multiverse
deb-src https://mirrors.ustc.edu.cn/ubuntu/ focal-updates main restricted universe multiversedeb https://mirrors.ustc.edu.cn/ubuntu/ focal-backports main restricted universe multiverse
deb-src https://mirrors.ustc.edu.cn/ubuntu/ focal-backports main restricted universe multiverse## Not recommended
# deb https://mirrors.ustc.edu.cn/ubuntu/ focal-proposed main restricted universe multiverse
# deb-src https://mirrors.ustc.edu.cn/ubuntu/ focal-proposed main restricted universe multiverse
将下载好sources.list文件通过上面设置的共享存放到用户名aping目录下。
因为之前做测试,使用的源为阿里云的源,现将其备份
sudo cp /etc/apt/sources.list /etc/apt/sources.list.bakaliyun
将下载的sources.list移动到/etc/apt目录下
sudo mv -f sources.list /etc/apt/更新软件包索引
sudo apt update更新完升级软件包
sudo apt upgrade3,安装必要的库和工具
请注意,这里比较重要,参考其他人的文档和官网文档用一步进行安装,会出现问题,导致安装不完整,从而导致后期编译出现“3000”和“4000”错误。
使用如下apt-get命令安装后续操作所需的库和工具:下面每一步都需要用户确认Y/n,需要依次安装
【1】
sudo apt-get install binutils binutils-dev git git-lfs gnupg flex bison gperf【2】
sudo apt-get install build-essential zip curl zlib1g-dev libc6-dev-i386 lib32ncurses5-dev x11proto-core-dev libx11-dev lib32z1-dev ccache libgl1-mesa-dev libxml2-utils xsltproc【3】
sudo apt-get install unzip m4 bc gnutls-bin python3.8 python3-pip ruby genext2fs device-tree-compiler【4】
sudo apt-get install make libffi-dev e2fsprogs pkg-config perl openssl libssl-dev libelf-dev libdwarf-dev u-boot-tools mtd-utils cpio doxygen liblz4-tool openjdk-8-jre gcc g++ texinfo【5】
sudo apt-get install dosfstools mtools default-jre default-jdk libncurses5 apt-utils wget scons【6】
sudo apt-get install python3.8-distutils tar rsync git-core libxml2-dev lib32z-dev grsync xxd【7】
sudo apt-get install libglib2.0-dev libpixman-1-dev kmod jfsutils reiserfsprogs xfsprogs squashfs-tools pcmciautils quota ppp libtinfo-dev libtinfo5 libncurses5-dev libncursesw5【8】
sudo apt-get install libstdc++6 gcc-arm-none-eabi vim ssh locales libxinerama-dev libxcursor-dev【9】
sudo apt-get install libxrandr-dev libxi-dev【10】 这部分最后安装
sudo apt-get install gcc-arm-linux-gnueabi gcc-9-arm-linux-gnueabi4,将Python 3.8设置为默认Python版本。
先查看下Python 3.8安装位置
which python3.8安装位置:/usr/bin/python3.8
将 Python和 Python3切换 为 Python 3. 8 :(下面指令参数最后面数字 1 表示优先级)
sudo update-alternatives --install /usr/bin/python python /usr/bin/python3.8 1响应信息:update-alternatives: using /usr/bin/python3.8 to provide /usr/bin/python (python) in auto mode
sudo update-alternatives --install /usr/bin/python3 python3 /usr/bin/python3.8 1响应信息:update-alternatives: using /usr/bin/python3.8 to provide /usr/bin/python3 (python3) in auto mode
三,注册码云账号并添加码云SSH公钥,为获取源码做准备
首先需要再码云(gitee)注册账号,然后在本地Ubuntu生成公钥,添加到码云用户账号下,参考官方怎样生成公钥
1,首先,您需要在客户端机器上生成一个SSH密钥对。使用ssh-keygen命令来生成密钥对。
ssh-keygen -t ed25519 -C "your_email@example.com" -t ed25519 :指定密钥类型为ed25519。
-C “your_email@example.com”:添加注释(通常是您的电子邮件地址),这有助于识别密钥。
执行上述命令后,系统会提示您输入文件名以保存密钥(默认情况下保存在~/.ssh/id_rsa中),以及是否设置密码短语。设置密码短语可以增加额外的安全层,但也可以留空以便免密码连接。
aping@HUAWEI-G540:~$ ssh-keygen -t ed25519 -C "aping@HUAWEI-G540"
Generating public/private ed25519 key pair.
Enter file in which to save the key (/home/aping/.ssh/id_ed25519):
Created directory '/home/aping/.ssh'.
Enter passphrase (empty for no passphrase):
Enter same passphrase again:
Your identification has been saved in /home/aping/.ssh/id_ed25519
Your public key has been saved in /home/aping/.ssh/id_ed25519.pub
The key fingerprint is:
SHA256:2y7cORieeCCFfM0KVgQArz9cgay1tLPe37rJwhuFww4 aping@HUAWEI-G540
The key's randomart image is:
+--[ED25519 256]--+
|.....o.          |
| o .  .          |
|  *..o o         |
| = +=oo o        |
|o E.=+..S        |
| o *.oo .o       |
|  =.o. =.=..     |
| . ooo.oB.+      |
|  . o+*+....     |
+----[SHA256]-----+
aping@HUAWEI-G540:~$
2,查看生成的密钥文件
生成密钥对后,您的SSH目录(通常是~/.ssh)中将包含以下两个文件:
id_rsa:私钥文件。
id_rsa.pub:公钥文件。
aping@HUAWEI-G540:~$ ls ~/.ssh/
id_ed25519  id_ed25519.pub
aping@HUAWEI-G540:~$
3,读取公钥文件 ~/.ssh/id_ed25519.pub:
cat ~/.ssh/id_ed25519.pub
ssh-ed25519 AAA*********************************FYg0xsQ aping@HUAWEI-G540
复制终端输出的公钥。然后用户可以通过主页右上角 「个人设置」->「安全设置」->「SSH 公钥」->「添加公钥」 ,添加生成的 public key 添加到当前账户
4,验证,通过 ssh -T 测试时,输出 SSH Key 绑定的用户名:
aping@HUAWEI-G540:~$ ssh -T git@gitee.com
The authenticity of host 'gitee.com (180.76.199.13)' can't be established.
ECDSA key fingerprint is SHA256:FQGC9Kn/eye****************************.
Are you sure you want to continue connecting (yes/no/[fingerprint])? yes
Warning: Permanently added 'gitee.com,180.76.199.13' (ECDSA) to the list of known hosts.
Hi apinggitee(@pathbreaker)! You've successfully authenticated, but GITEE.COM does not provide shell access.
aping@HUAWEI-G540:~$
5,安装git客户端和git-lfs
sudo apt-get update
sudo apt-get install git
sudo apt-get install git-lfs
6,执行如下命令安装码云repo工具
参考curl下载repo工具 报错,提供的方法,使用curl命令从码云获取repo脚本将repo脚本下载到/usr/local/bin/repo路径下。
aping@HUAWEI-G540:~$ su
Password:
root@HUAWEI-G540:/home/aping#输入正确的root用户密码,看到命令行开头为"root@",表示切换成功。如果遇到“Permission denied”错误,需要
sudo passwd root输入两遍密码以后,看到“password updated successfully”的提示信息,表示设置成功。
为root用户下载"curl"工具
root@HUAWEI-G540:/home/aping# apt-get install curl
Reading package lists... Done
Building dependency tree
Reading state information... Done
curl is already the newest version (7.68.0-1ubuntu2.25).
0 upgraded, 0 newly installed, 0 to remove and 0 not upgraded.
root@HUAWEI-G540:/home/aping#
运行命令
curl https://gitee.com/oschina/repo/raw/fork_flow/repo-py3 > /usr/local/bin/reporoot@HUAWEI-G540:/home/aping# curl https://gitee.com/oschina/repo/raw/fork_flow/repo-py3 > /usr/local/bin/repo% Total % Received % Xferd Average Speed Time Time Time CurrentDload Upload Total Spent Left Speed
100 36173 0 36173 0 0 75834 0 --:--:-- --:--:-- --:--:-- 75834
root@HUAWEI-G540:/home/aping#为下载的repo工具文件设置权限
chmod 777 /usr/local/bin/repo为repo工具文件设置权限,本条命令是给所有用户和所有组完全控制的权限,你也可以根据自己需要自己修改相应的权限。如果添加执行权限可以执行
chmod a+x /usr/local/bin/repo切换回原用户,继续操作。(这里的user对应的是你的用户名)
su user输入命令以后,看到命令行开头为"user@",表示切换成功。
root@HUAWEI-G540:/home/aping# su aping
aping@HUAWEI-G540:~$
测试连接情况
pip3 install -i https://repo.huaweicloud.com/repository/pypi/simple requests
aping@HUAWEI-G540:~$ pip3 install -i https://repo.huaweicloud.com/repository/pypi/simple requests
Looking in indexes: https://repo.huaweicloud.com/repository/pypi/simple
Requirement already satisfied: requests in /usr/lib/python3/dist-packages (2.22.0)
aping@HUAWEI-G540:~$
另外两个辅助工具
sudo apt-get install tree
sudo apt-get install htop7,在需要存放源码的根目录下配置用户信息
#以下操作需要再源码目录下进行
#建立源码目录
# 配置本地git环境
git config --global user.name "username"
git config --global user.email "your email"
git config --global credential.helper store
##使用repo工具初始化源码
repo init -u git@gitee.com:openharmony/manifest.git -b OpenHarmony-4.0-Release --no-repo-verify
#同步代码
repo sync -c -j8
#拉取静态大文件
repo forall -c 'git lfs pull'
(可选)#在源码根目录运行如下命令安装hb并更新至最新版本。这个命令会安装openharmony项目中带的hb。不同版本的openharmony使用的hb版本不同。所以必须使用下面这个命令。这样安装的hb命令只会在当前的项目中可用
python3 -m pip install --user build/hb
#设置环境变量,可选。
sudo vim ~/.bashrc
#将以下命令拷贝到.bashrc文件的最后一行,保存并退出。
export PATH=~/.local/bin:$PATH
#执行如下命令更新环境变量。
source ~/.bashrc
#在源码目录执行"hb help",显示help信息即表示安装成功
# 编译步骤
bash build/prebuilts_download.sh
./build.sh --product-name rk3568 --ccache
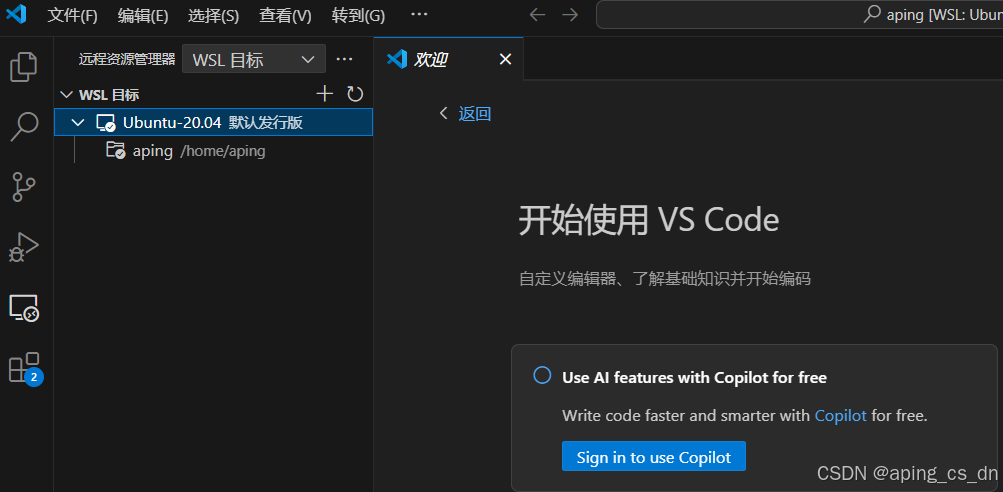
8,安装vscode,请自行安装,安装完毕后,打开vscode,在扩展栏搜索chinese 选择安装中文简体,安装后重启,接着在扩展栏搜索wls,安装wls 插件,因为系统已经安装wls ubuntu 20.04,vscode 会自动检测到,在远程资源管理器中能看到,点击连接即可。