课程的网站建设精准营销的案例
实验课的作业用一大堆框架/库,统统要用maven管理。
头一次用,真痛苦。
所幸得以解决,maven真香~
一步一步来。
1. maven
不是java人,只能说说粗浅的理解了。
简单来说,maven是一个管理项目的工具,可以帮助我们下载依赖、构建项目、打包、测试。
然而,需要编写恶心的pom.xml来实现。
IDEA自带的有maven,但是我们需要命令行,仅仅用IDEA的maven,不好理解。
所以第一步就是先下载并配置maven。
下载配置maven
linux人,直接apt install maven结束。
windows,官网下载,配配环境变量就OK了,在IDEA的设置里写上你的maven可执行文件路径。
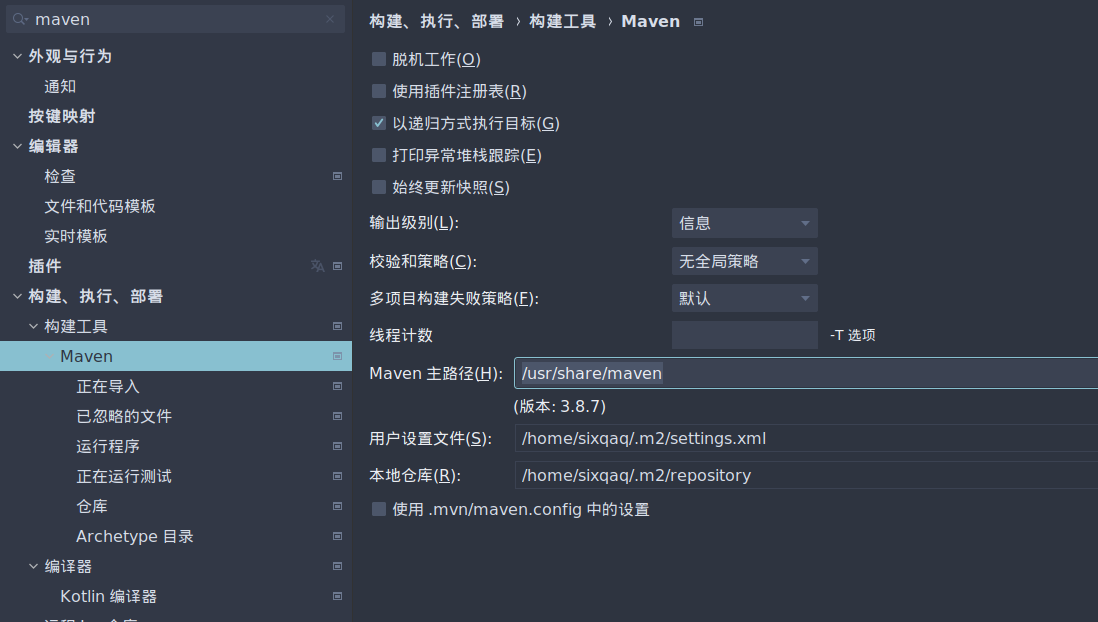
下来,还需要换镜像,linux在/etc/maven/setting.xml里,windows下载的包里搜一下也出来了,
在<mirrors> ... <mirros>中间放上阿里的镜像站:
<mirror><id>aliyunmaven</id><mirrorOf>*</mirrorOf><name>阿里云公共仓库</name><url>https://maven.aliyun.com/repository/public</url></mirror>
这份文件写满了注释,有其他需要可以自己看一下,比如设置仓库路径:
<localRepository>/path/to/local/repo</localRepository>
默认仓库路径是{用户目录}/.m2/repository
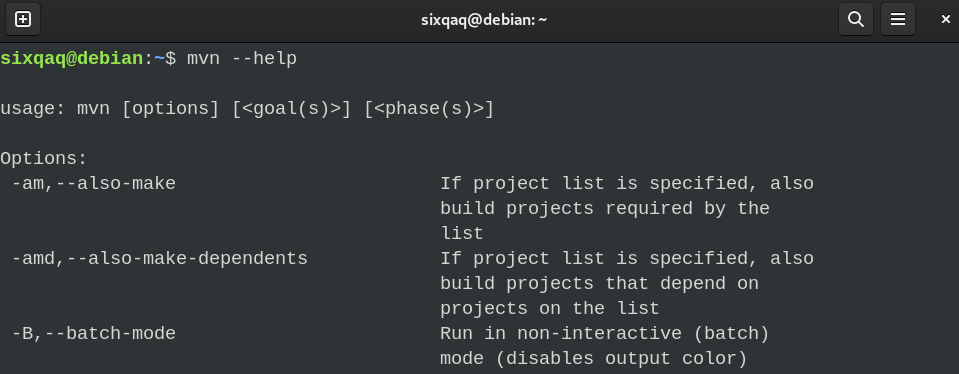
这一步配好后,你的命令行应该有mvn命令。
可以mvn --help测试一下。
2. 最小化pom.xml
为了方便理解,建议命令行操作。
假设我们的项目结构是下面这样:
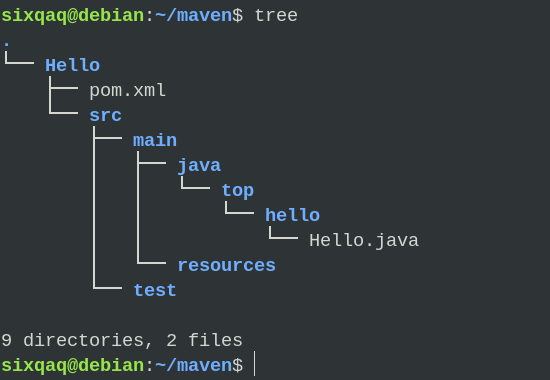
包名为top.hello,主类Hello.java的内容如下 :
package top.hello;
public class Hello{public String sayHello(String name){return "Hello "+name + "!";}public static void main(String []args){System.out.println("Hello world");}
}
按理来说,下面的就够了:
<?xml version="1.0"?>
<project xmlns="http://maven.apache.org/POM/4.0.0"xmlns:xsi="http://www.w3.org/2001/XMLSchema-instance"xsi:schemaLocation="http://maven.apache.org/POM/4.0.0 http://maven.apache.org/xsd/maven-4.0.0.xsd"><modelVersion>4.0.0</modelVersion><groupId>top.hello</groupId><artifactId>Hello</artifactId><version>0.0.1-SNAPSHOT</version></project>
很简单,前面的乱七八糟的链接就不要记了,让插件/IDE生成,官网也有。
在pom.xml同级目录下执行mvn compile来编译,它会报错:
$ mvn compile
...
ERROR] COMPILATION ERROR :
[INFO] -------------------------------------------------------------
[ERROR] 不再支持源选项 5。请使用 7 或更高版本。
[ERROR] 不再支持目标选项 5。请使用 7 或更高版本。
[INFO] 2 errors
[INFO] -------------------------------------------------------------
[INFO] ------------------------------------------------------------------------
[INFO] BUILD FAILURE
[INFO] ------------------------------------------------------------------------
[INFO] Total time:  0.747 s
[INFO] Finished at: 2023-04-25T15:38:10+08:00
[INFO] ------------------------------------------------------------------------
[ERROR] Failed to execute goal org.apache.maven.plugins:maven-compiler-plugin:3.1:compile (default-compile) on project Hello: Compilation failure: Compilation failure:
[ERROR] 不再支持源选项 5。请使用 7 或更高版本。
[ERROR] 不再支持目标选项 5。请使用 7 或更高版本。...
浅搜了一下,说是maven默认的jdk版本太低,此时注意到了IDEA自动生成的pom.xml会有这么一段:
<properties><maven.compiler.source>17</maven.compiler.source><maven.compiler.target>17</maven.compiler.target><project.build.sourceEncoding>UTF-8</project.build.sourceEncoding></properties>
OK,把这段加到<project></project>下就可以了,看起来意思是用jdk17。
所以真正可用的maven配置如下:
<?xml version="1.0"?>
<project xmlns="http://maven.apache.org/POM/4.0.0"xmlns:xsi="http://www.w3.org/2001/XMLSchema-instance"xsi:schemaLocation="http://maven.apache.org/POM/4.0.0 http://maven.apache.org/xsd/maven-4.0.0.xsd"><modelVersion>4.0.0</modelVersion><groupId>top.hello</groupId><artifactId>Hello</artifactId><version>0.0.1-SNAPSHOT</version><properties><maven.compiler.source>17</maven.compiler.source><maven.compiler.target>17</maven.compiler.target><project.build.sourceEncoding>UTF-8</project.build.sourceEncoding></properties></project>
还有个<name>Hello</name>,多了少了貌似都没影响。
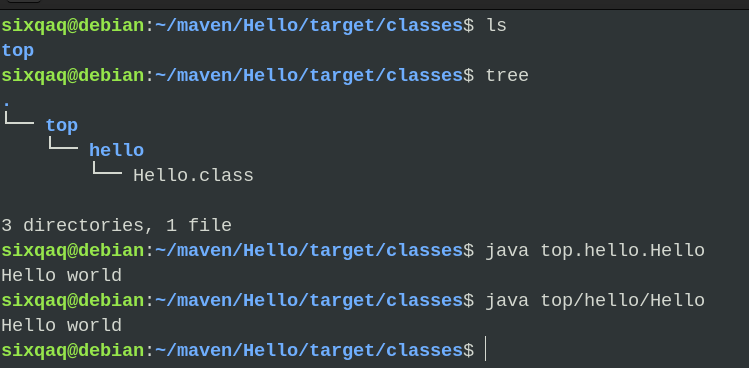
运行mvn compile,就会生成一个target目录,用命令行运行一下。
3. 可用的pom.xml
上面的已经是可以用的了,但是用起来并不方便。
在IDEA里面直接点构建会报错,也无法运行。
3.1 默认行为
在<project>下添加:
<build><defaultGoal>package</defaultGoal>
</build>
这样默认构建,比如命令行输入mvn,或者IDEA里点构建,就会执行mvn package,会生成jar包。
也可以改成 <defaultGoal>compile</defaultGoal>,默认行为是编译。
3.2 mvn package
mvn package打包成jar,java -jar XXX.jar运行时会报错,找不到MANIFEST什么的,可以手动解包写一份配置文件再打包进去。
也可以在maven中设置:
<plugins><plugin><!-- Build an executable JAR --><groupId>org.apache.maven.plugins</groupId><artifactId>maven-jar-plugin</artifactId><version>3.1.0</version><configuration><archive><manifest><addClasspath>true</addClasspath><classpathPrefix>lib/</classpathPrefix><mainClass>top.hello.Hello</mainClass></manifest></archive></configuration></plugin>
</plugins>
3.3 引入库
如果你需要引入库,在<project>下添加:
<dependencies><dependency><groupId>junit</groupId><artifactId>junit</artifactId><version>4.0</version><scope>test</scope></dependency></dependencies>
更多的库,在<dependencies>里加更多个<denpendency>并填好就行了。
最终就变成这样:
<?xml version="1.0"?>
<project xmlns="http://maven.apache.org/POM/4.0.0"xmlns:xsi="http://www.w3.org/2001/XMLSchema-instance"xsi:schemaLocation="http://maven.apache.org/POM/4.0.0 http://maven.apache.org/xsd/maven-4.0.0.xsd"><modelVersion>4.0.0</modelVersion><groupId>top.hello</groupId><artifactId>Hello</artifactId><version>0.0.1-SNAPSHOT</version><properties><maven.compiler.source>17</maven.compiler.source><maven.compiler.target>17</maven.compiler.target><project.build.sourceEncoding>UTF-8</project.build.sourceEncoding></properties><name>Hello</name><build><defaultGoal>package</defaultGoal><plugins><plugin><!-- Build an executable JAR --><groupId>org.apache.maven.plugins</groupId><artifactId>maven-jar-plugin</artifactId><version>3.1.0</version><configuration><archive><manifest><addClasspath>true</addClasspath><classpathPrefix>lib/</classpathPrefix><mainClass>top.hello.Hello</mainClass></manifest></archive></configuration></plugin></plugins></build><dependencies><dependency><groupId>junit</groupId><artifactId>junit</artifactId><version>4.0</version><scope>test</scope></dependency></dependencies></project>
打包依赖
用的spring,打包的jar运行时报错,找不到spring-context。
需要打包依赖。
在build里加上下面的:
<plugins><plugin><groupId>org.apache.maven.plugins</groupId><artifactId>maven-dependency-plugin</artifactId><version>2.10</version><executions><execution><id>copy-dependencies</id><phase>package</phase><goals><goal>copy-dependencies</goal></goals><configuration><outputDirectory>${project.build.directory}/lib</outputDirectory></configuration></execution></executions></plugin>
</plugins>
然后整个build 就像下面的:
<build><defaultGoal>package</defaultGoal><plugins><plugin><groupId>org.apache.maven.plugins</groupId><artifactId>maven-dependency-plugin</artifactId><version>2.10</version><executions><execution><id>copy-dependencies</id><phase>package</phase><goals><goal>copy-dependencies</goal></goals><configuration><outputDirectory>${project.build.directory}/lib</outputDirectory></configuration></execution></executions></plugin><plugin><!-- Build an executable JAR --><groupId>org.apache.maven.plugins</groupId><artifactId>maven-jar-plugin</artifactId><version>3.1.0</version><configuration><archive><manifest><addClasspath>true</addClasspath><classpathPrefix>lib/</classpathPrefix><mainClass>top.hello.TestHelloSpring</mainClass></manifest></archive></configuration></plugin></plugins></build>
这样打包完之后,依赖在lib里,运行时:java -jar demo*.jar -classpath lib即可。
参考博客
Maven 最全教程,看了必懂
Maven打包所有依赖到一个可执行jar中